I recently completed an important commission of a local fencing legend, Jim Campoli. I thought I'd share with you the steps taken to develop the painting.
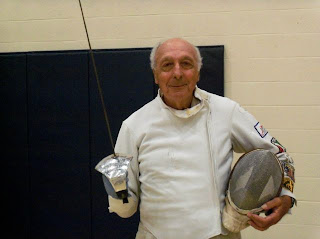 |
| Source photo taken by Stewart McVickers II. |
I usually prefer to work from life when executing a portrait, but this painting was to be given as a surprise gift to Mr. Campoli. So, I had to work from photographs provided by the client. Out of four choices, the client and I chose the photo above to be source for the final composition.
 |
| Step 1- Line Drawing |
 |
| Step 2- I start blocking in the face, jacket and background color. |
 |
| Step 3- I work on the background and start on the form of the fencing mask. |
 |
| Step 4. Starting to work on the saber here. |
 |
| Step 5. Final version of oil portrait. |


Comments